

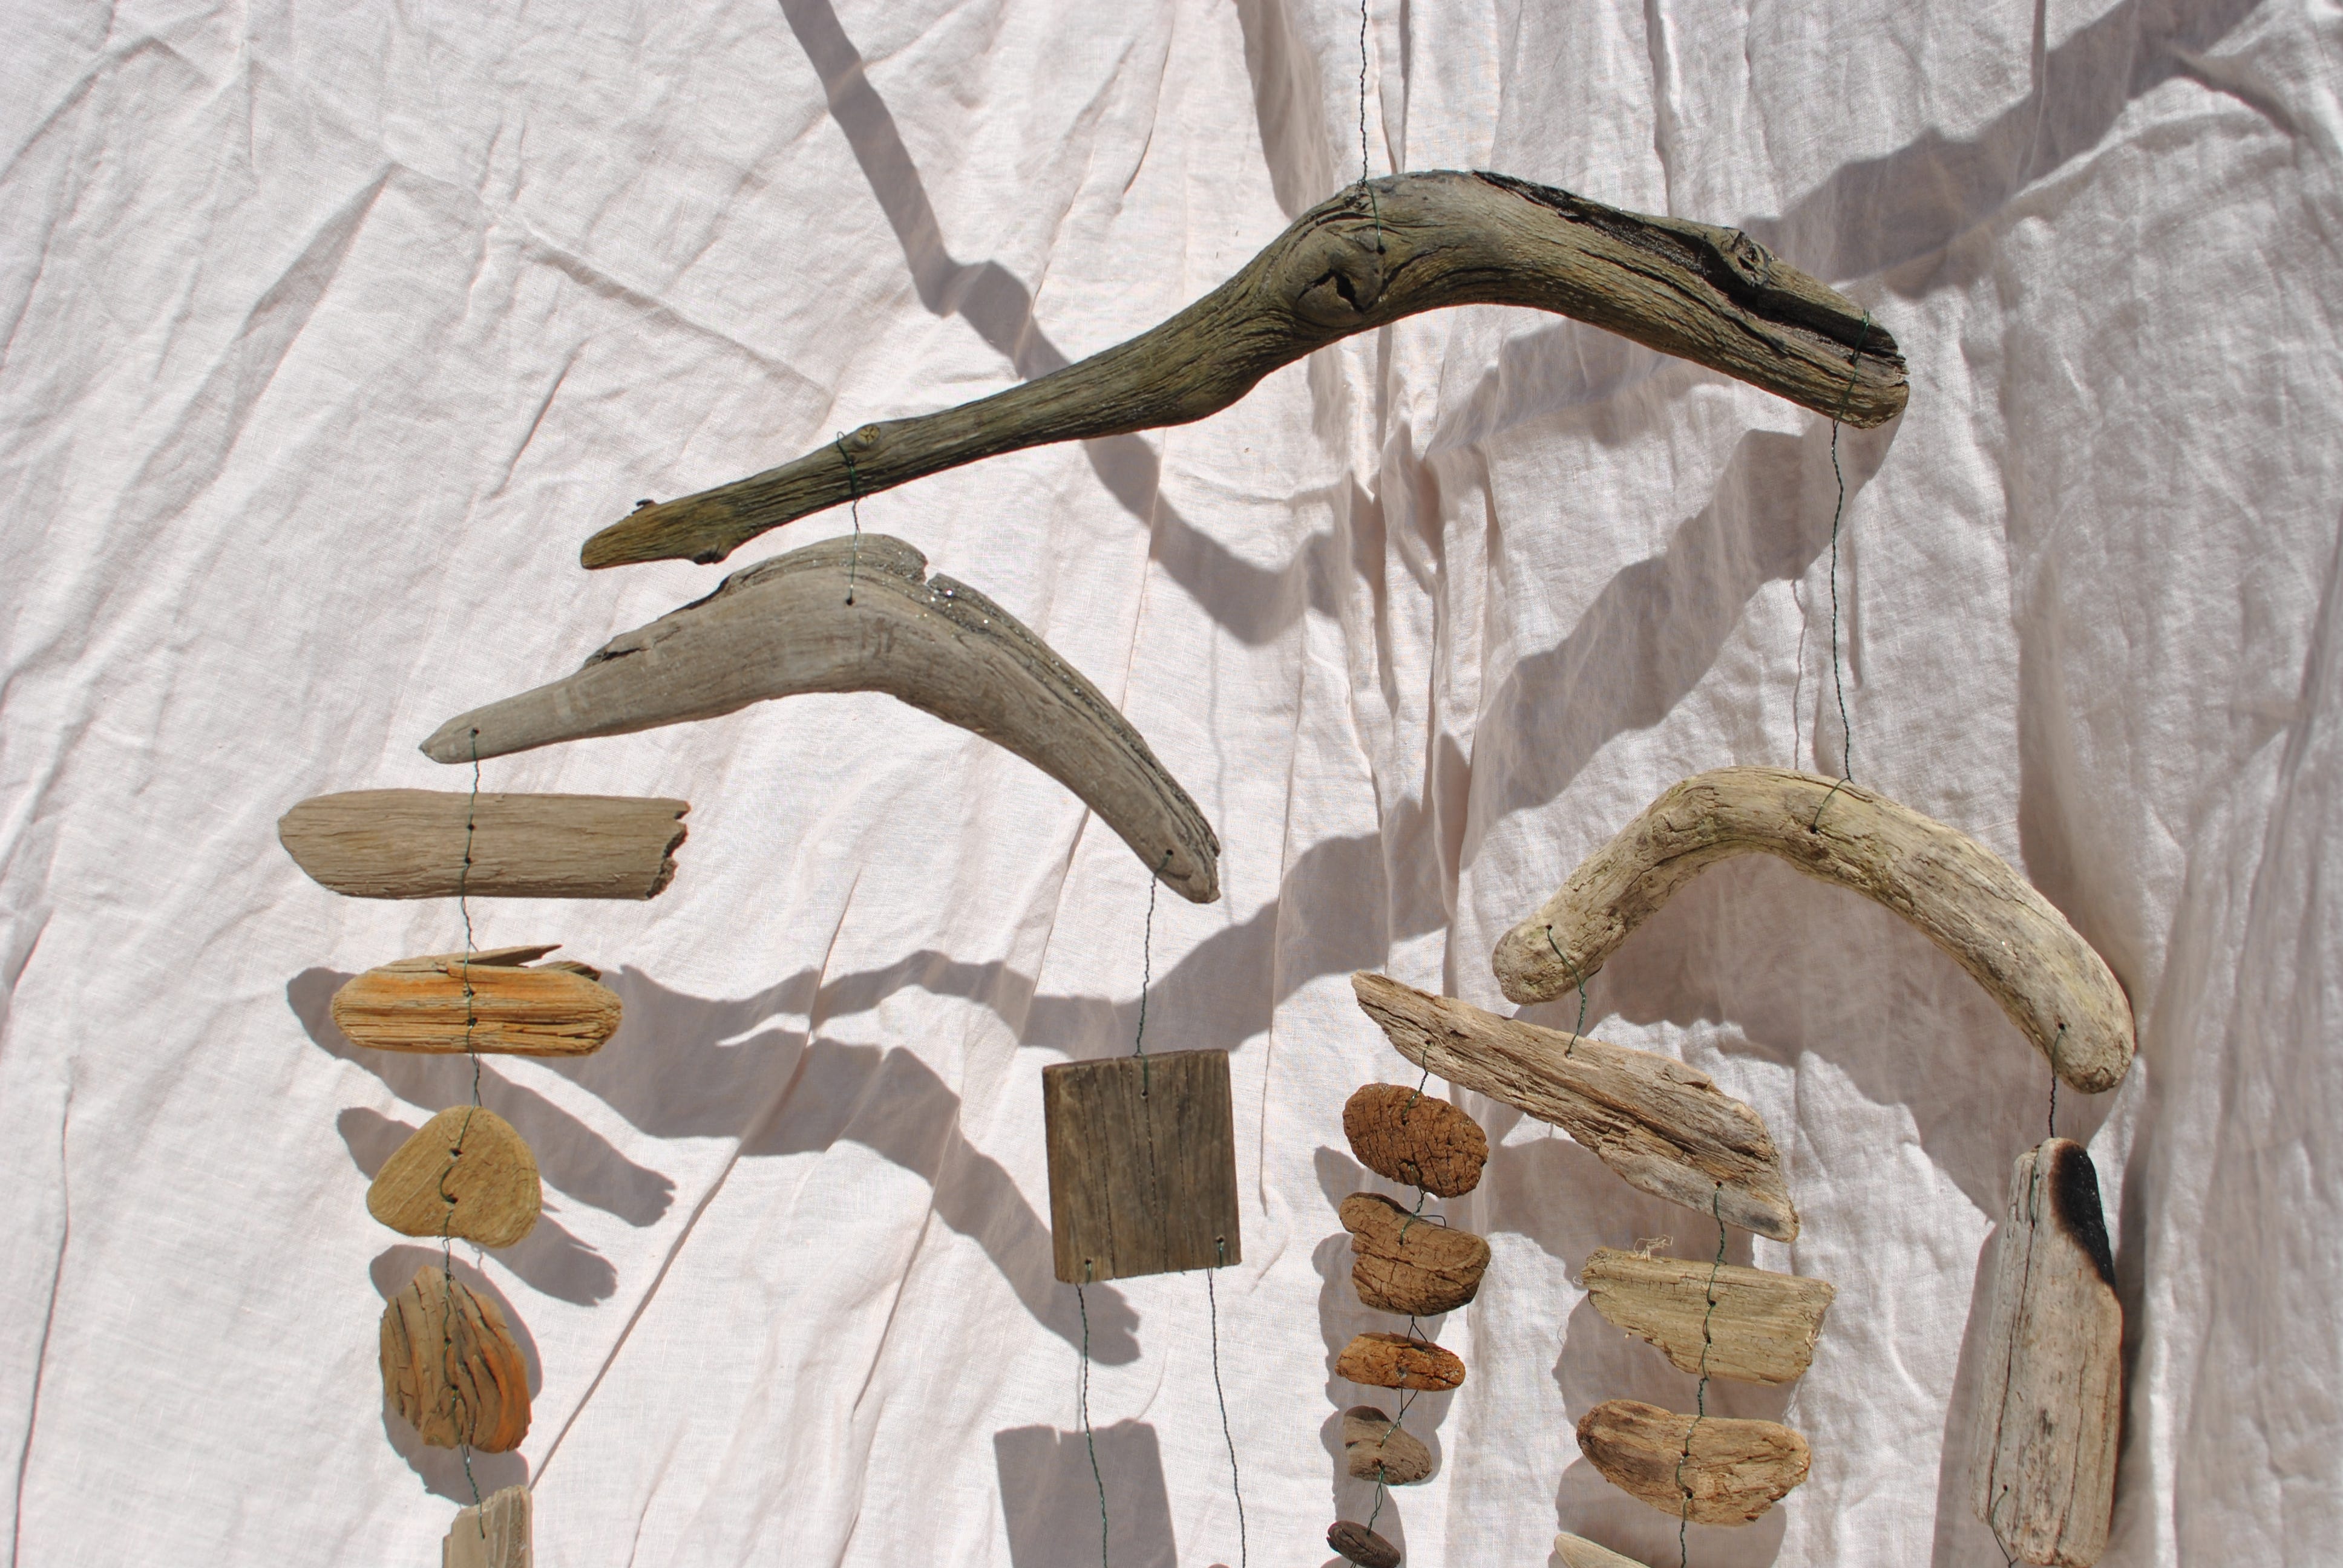
At my aunt and uncle’s house, casually and languidly spinning in the draft of an open window, there is a driftwood mobile made by a cousin. I’ve always thought it was just great. It’s clever, it’s pretty, and it strikes the right, and often elusive, aesthetic note for a beach cottage—just seaside enough before entering the true “coastal decor” vortex.
I decided to try making one for a print edition of Treehouse a summer or so ago. For me, this is such a perfect project. It looks breezy and wabi sabi, but it actually requires a lot of scrupulous measuring and, importantly, the deft use of a drill.
Ready to put one together?
We’re still just flirting with summer feelings here in Maine (yes, even in June), but what a perfect time to sort of gear up. I’m thinking of this time like those exciting, anticipatory Advent weeks—but for the other solstice.
Driftwood Mobile
YOU WILL NEED
+ A variety of collected driftwood, various sizes, but obviously small enough to string up
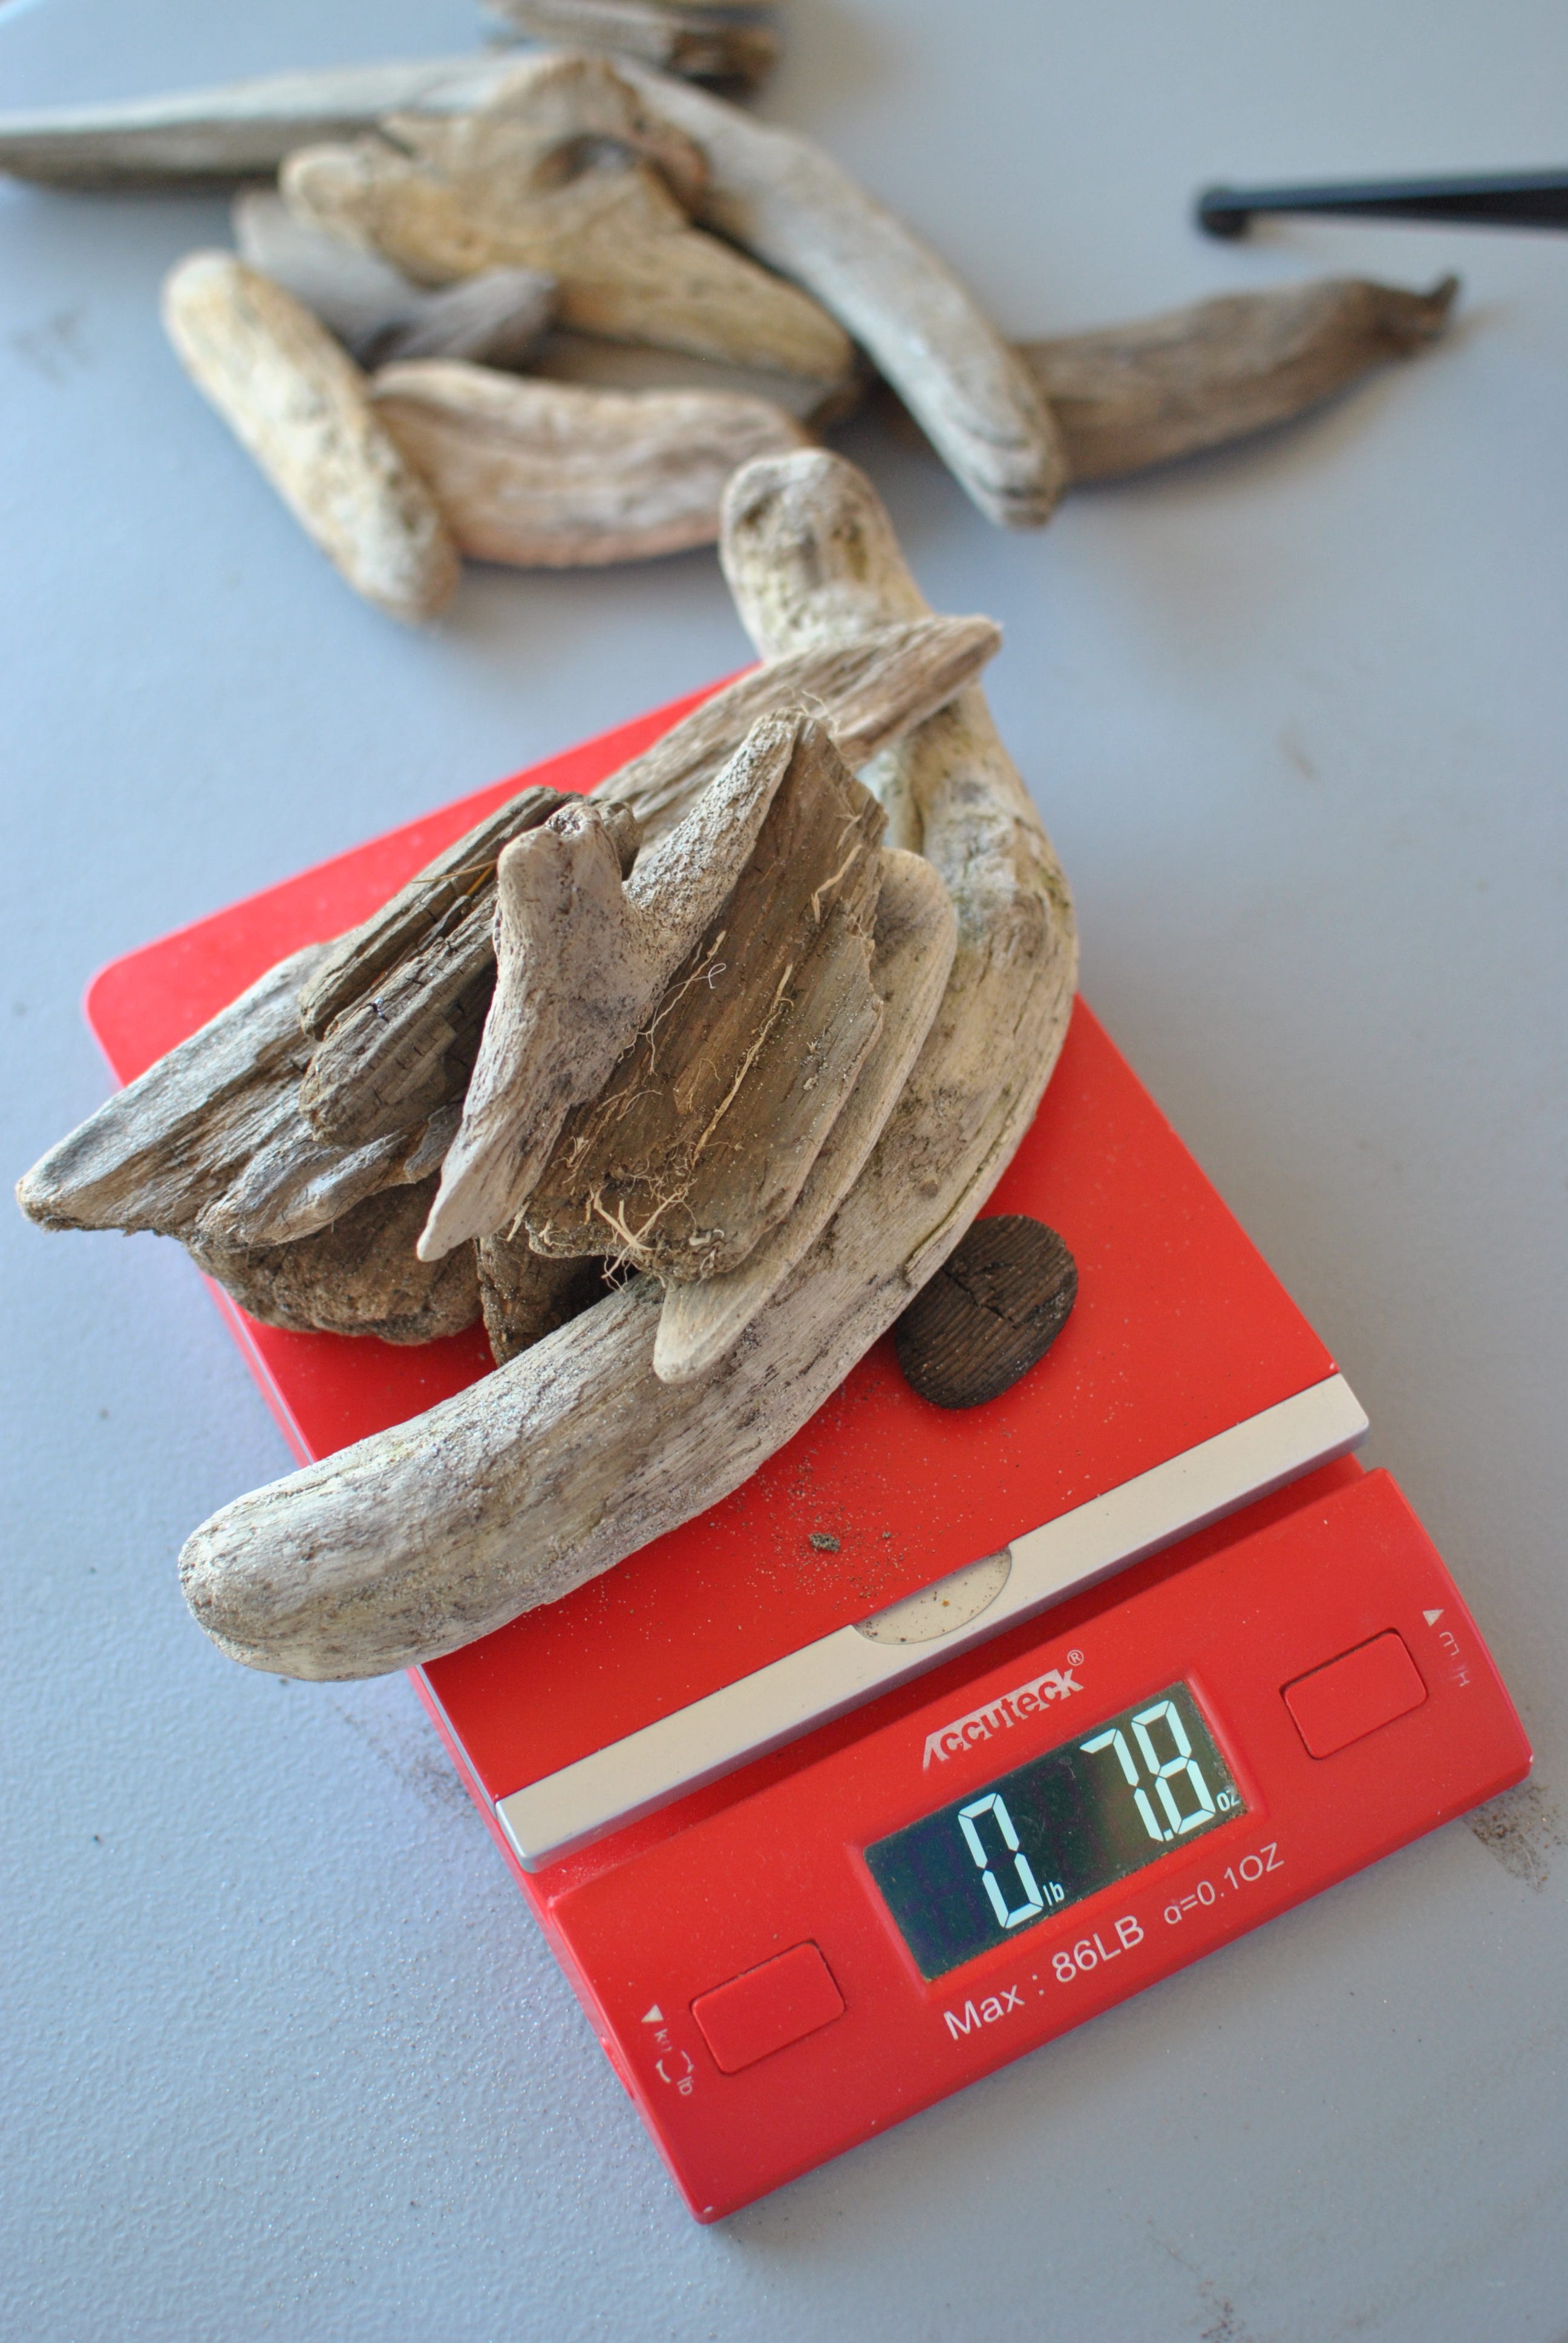
+ Scale (kitchen or shipping; bathroom probably not ideal)
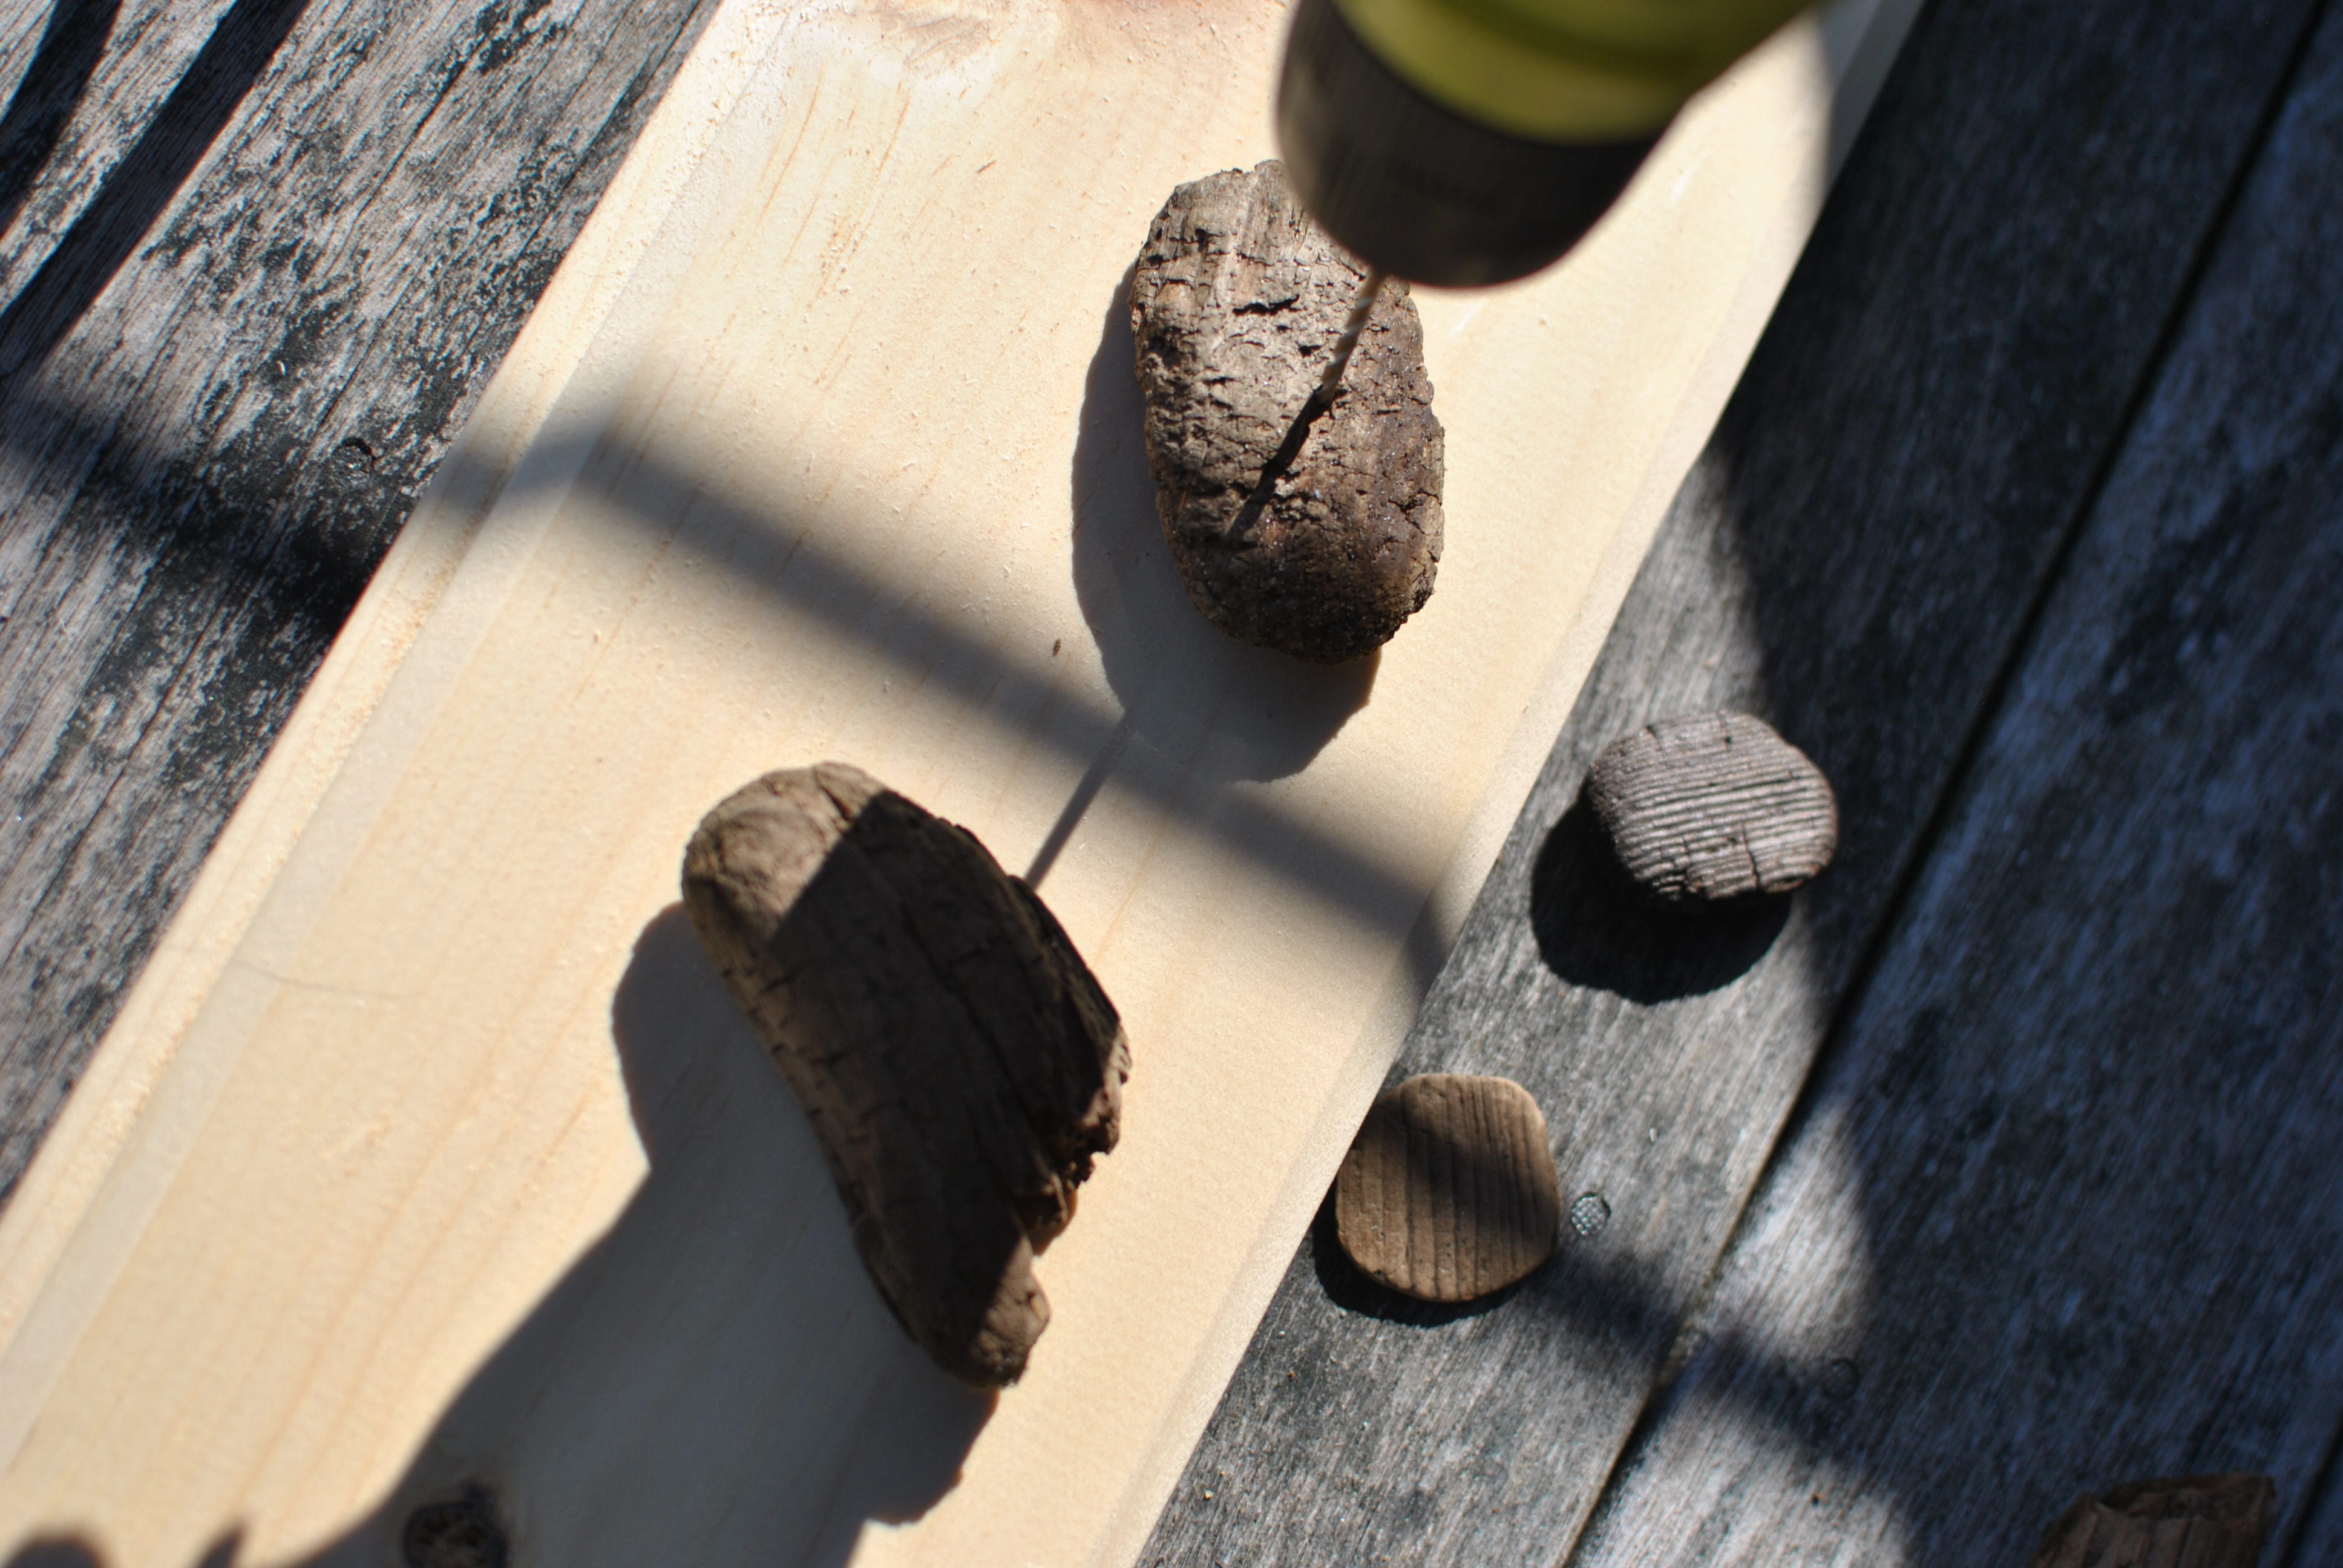
+ Cordless drill with smallest/small-ish drill attachment
+ Florist’s wire
+ Wire cutter


PROCESS
1. Identify a few longer pieces to use horizontally. Take the largest and put that aside for now.
2. Split the driftwood pieces into two equal-ish groups, doing your best to just eyeball it. Each group should have one horizontal piece included.
3. Weigh each of these groups. If one is larger, choose a piece to move to the other group. Keep moving pieces around until both groups weigh the same amount (or as close as you can get it—but, try!).
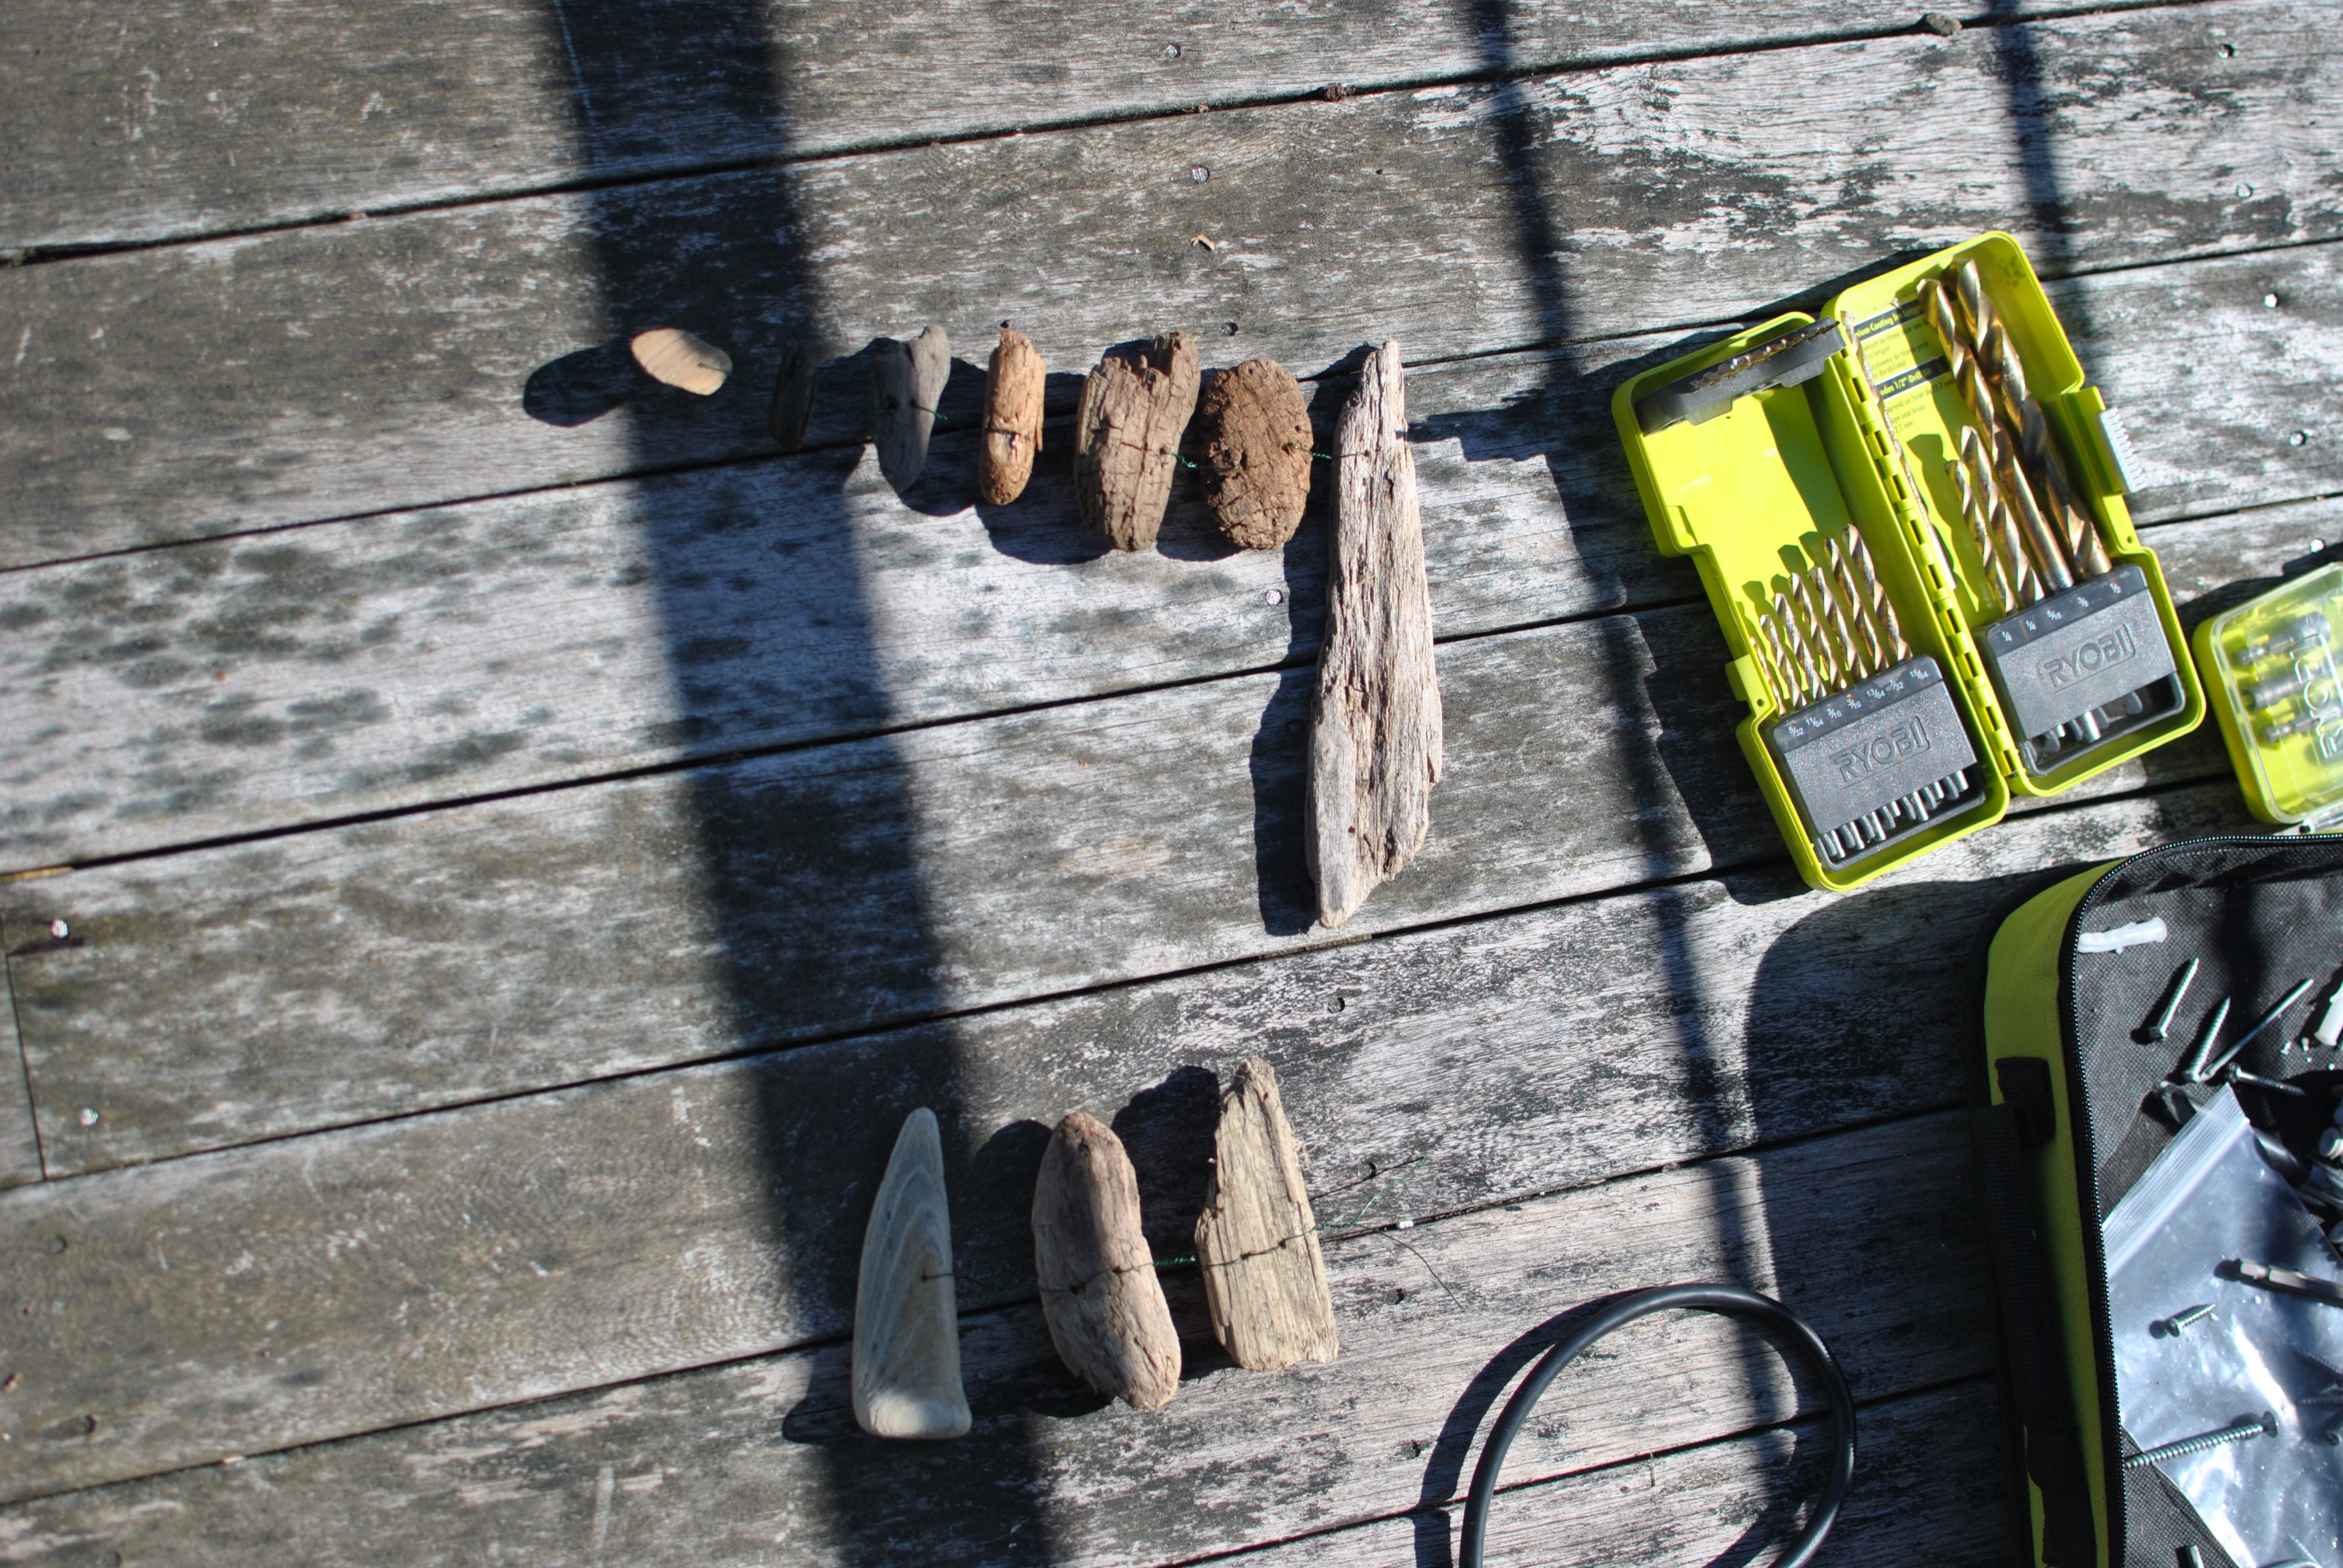
4. Now that you know the top horizontal piece will be level, do the same process within each group. First, work on what we can call Group A: Divide smaller pieces in two, then weigh each of those sub-groups to make those piles equal. Then you can decide if you want to go further and further with this.
5. Repeat the process for the other main group, what we can call Group B.
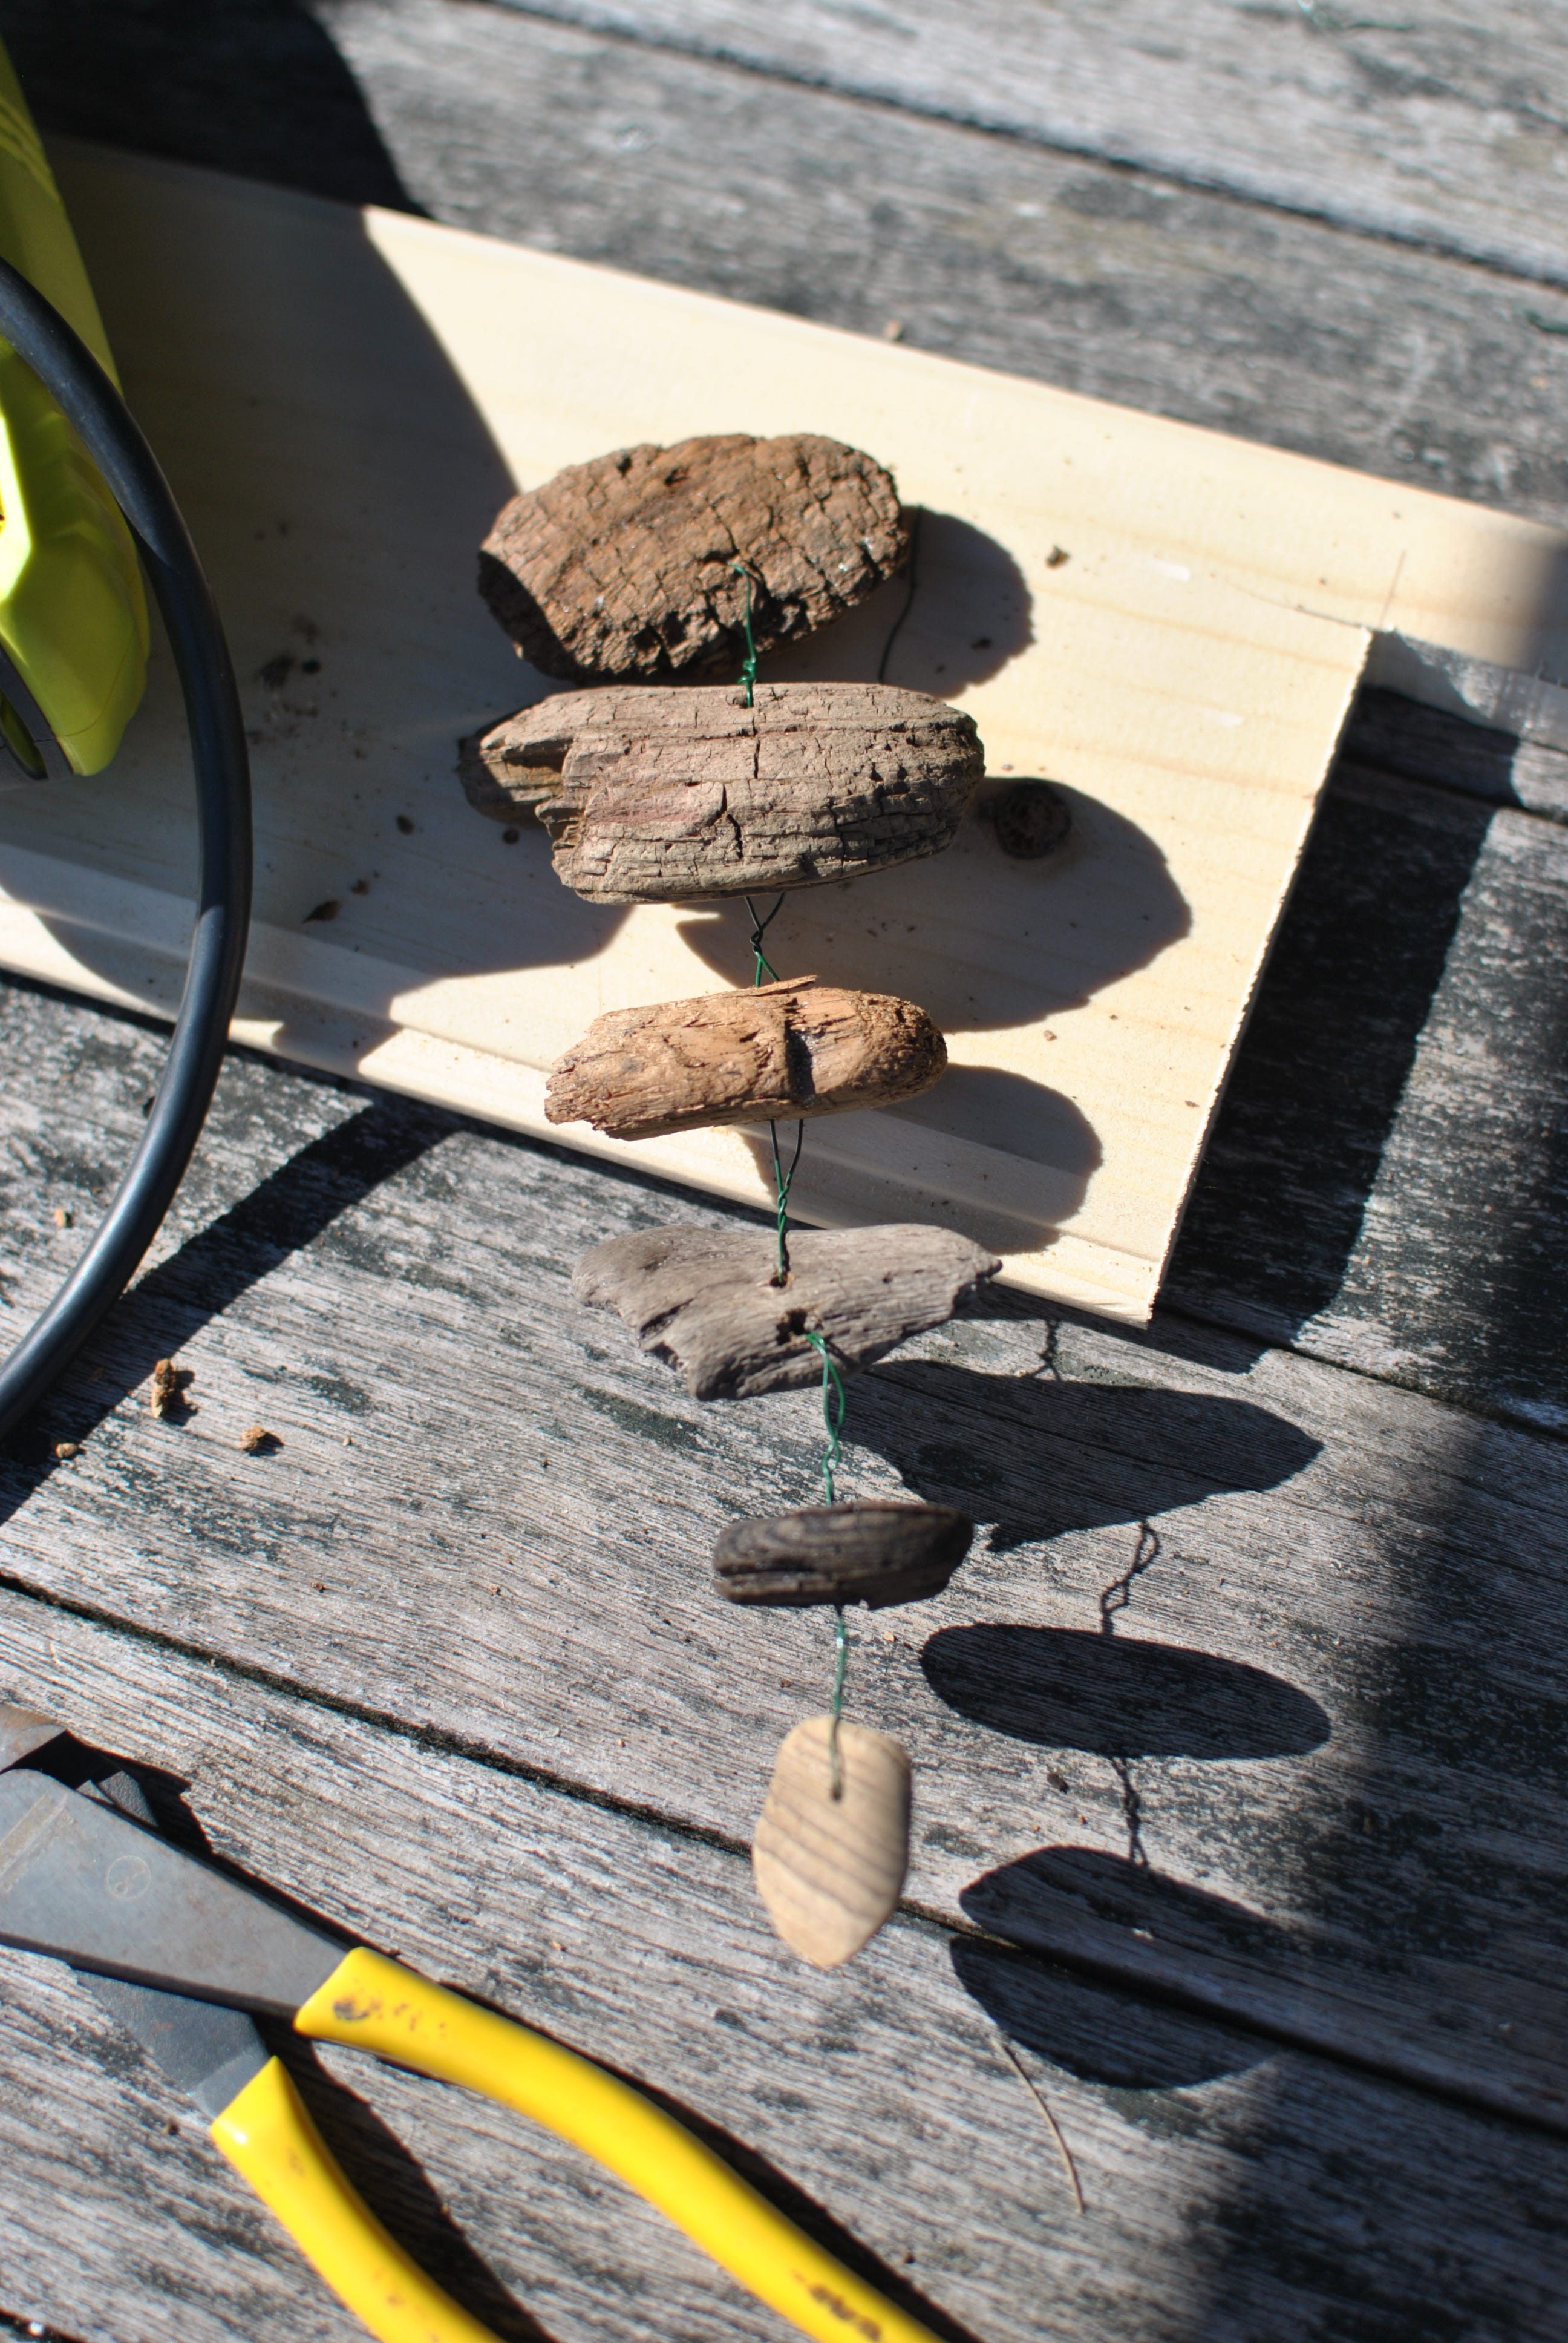
6. Now that you have wood pieces arranged by equal weights, we can start putting the mobile together. Use your cordless drill to carefully drill a hole (or two holes, depending on how you’ve decided to arrange things) in each piece of wood.
7. Then, simply take your florist’s wire and connect them together. If you’ve been persnickety enough with your weights, it should all come together fairly easily at this point.
8. I recommend starting from the bottom pieces and then working up, attaching each sub-grouping to each horizontal piece; then the two horizontal pieces to the main/largest horizontal piece that you put aside.
9. Finally, loop some florist’s twine loosely around the center of the largest horizontal piece. Hold the whole thing suspended in the air; slide the loop around the center of this main piece to find the balance point. Make a mark at that balance point, then carefully lay the whole mobile down, and drill a hole at the mark. Attach one last piece of florist’s wire to that top center hole—or something prettier and more decorative, be you—and find a nice place to hang it!
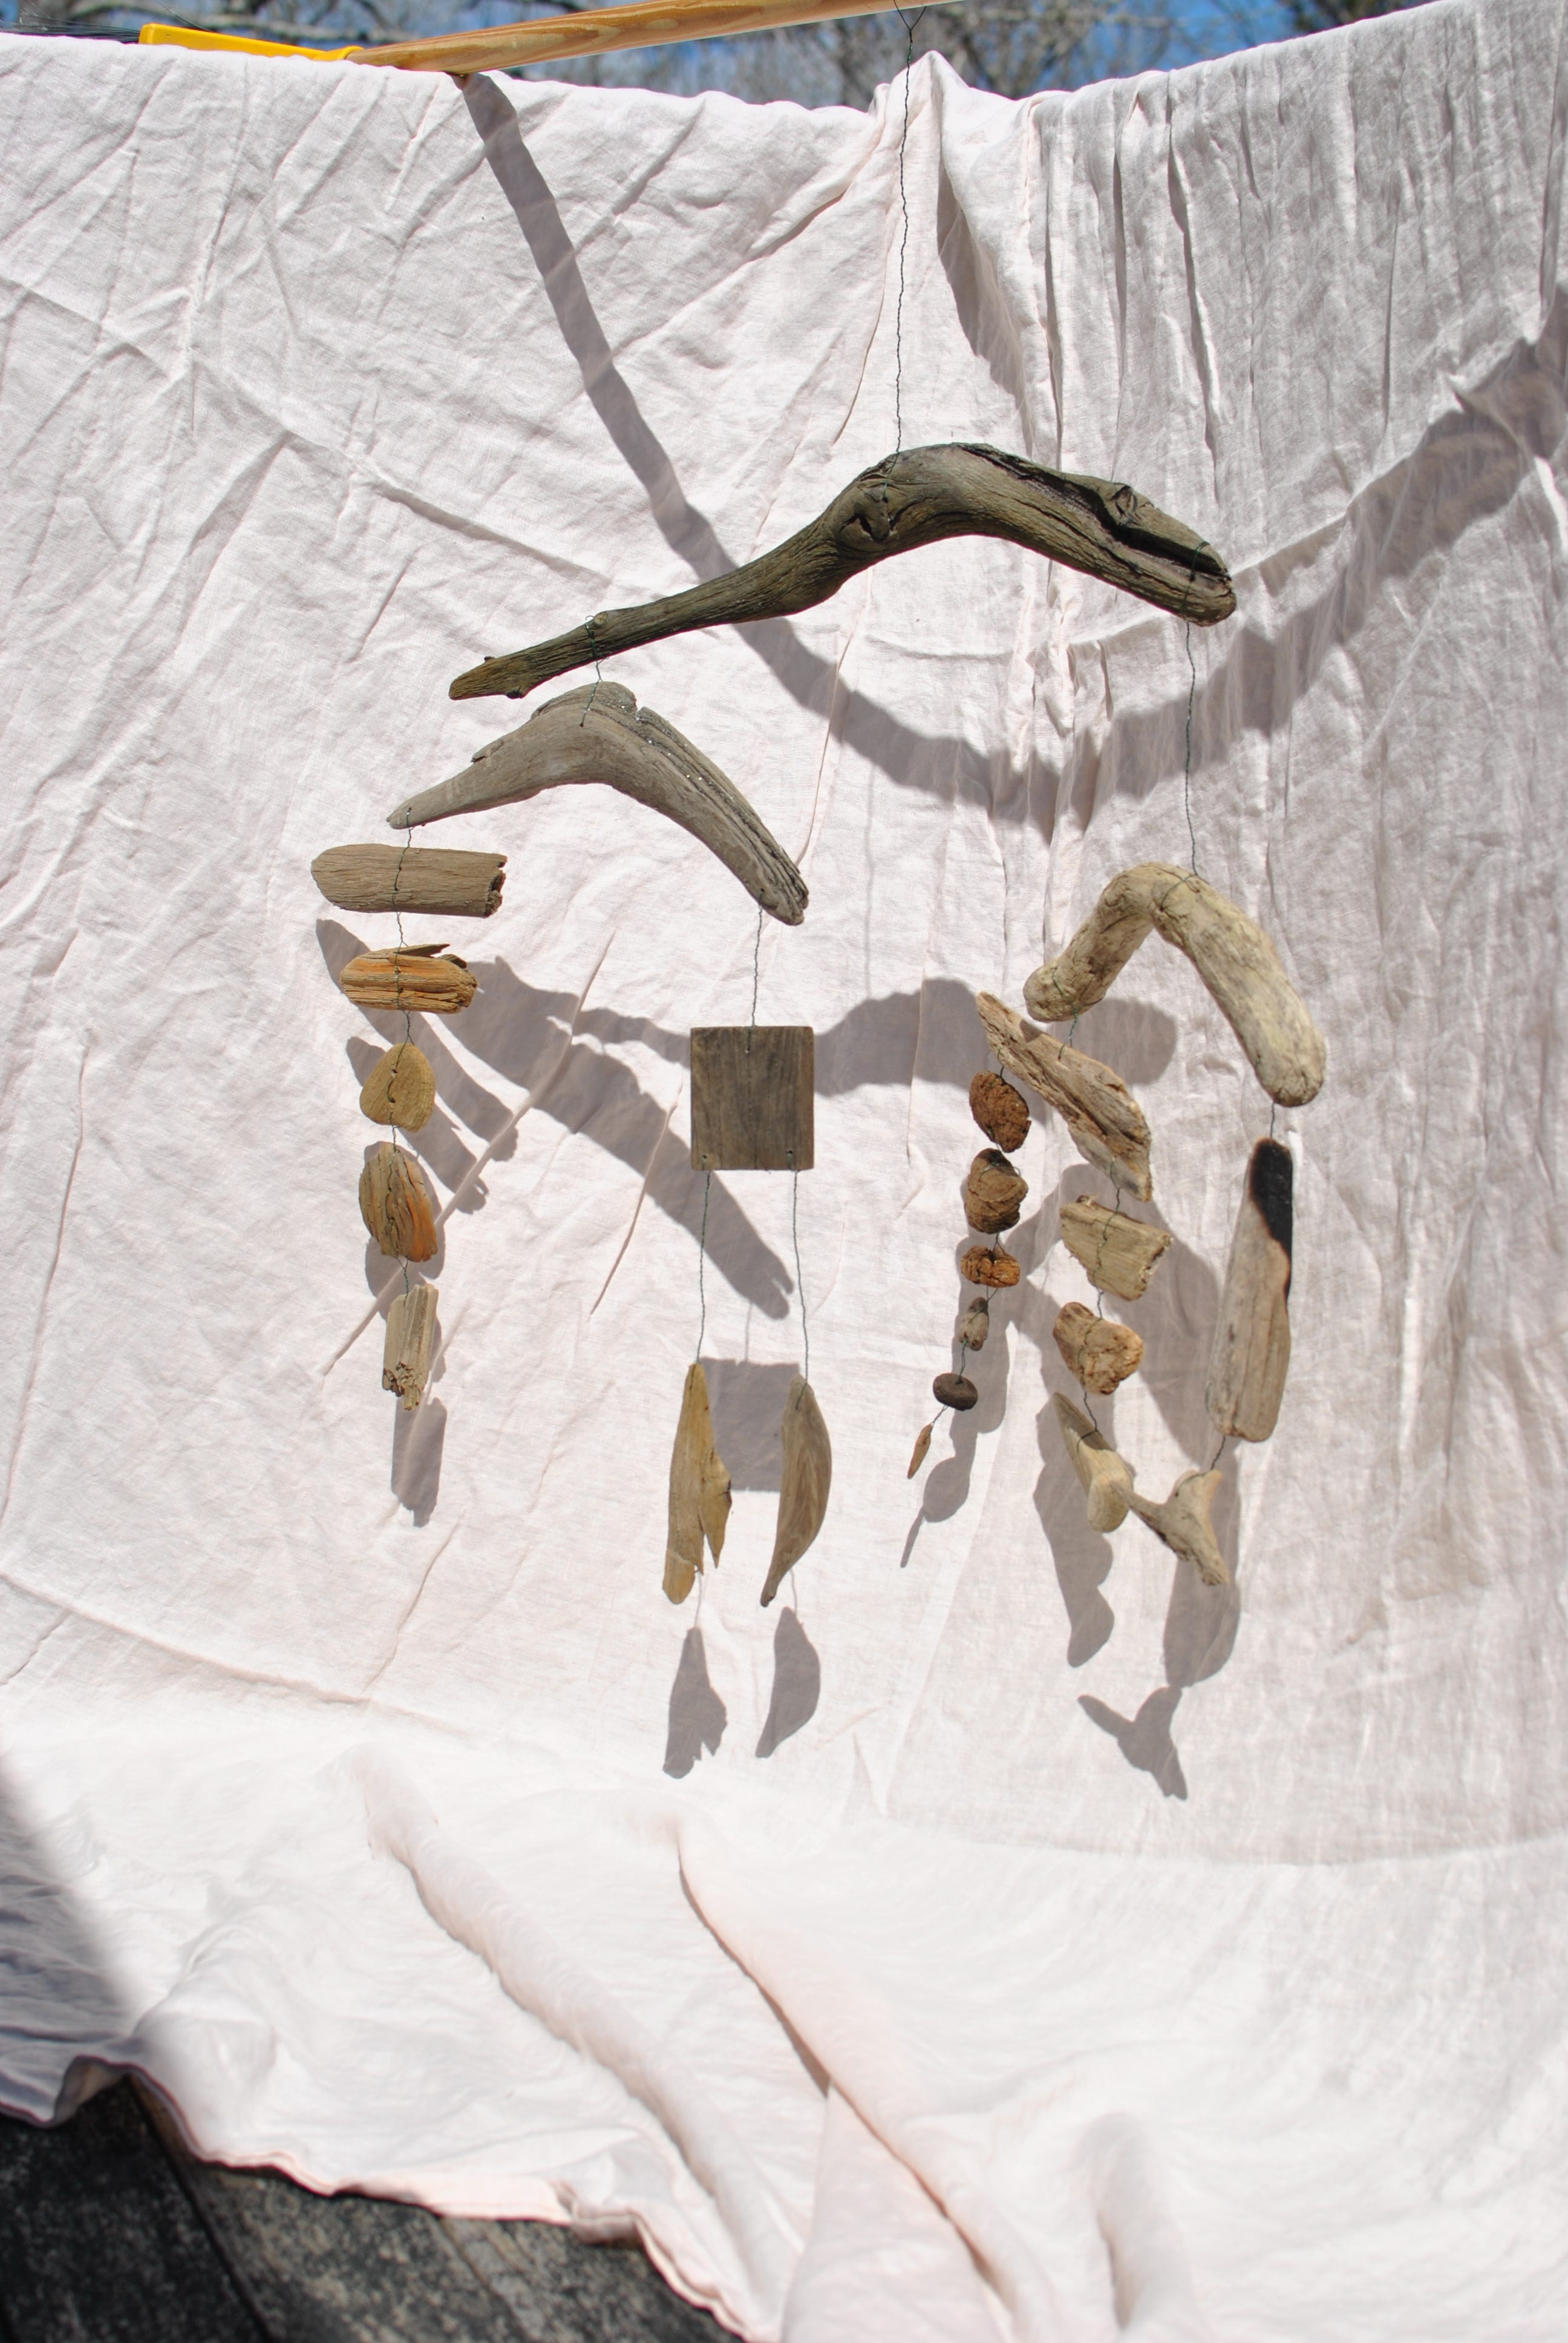
Hopefully that wasn’t completely incomprehensible because I really hope you try to make one! Let me know (if you make one, if you need more instruction, etc.) and let me know how it goes~!

For you in the clique this summer, in Houston. (LINK)
Whoa. (LINK)
I’m not sure if people are actually shopping here anymore, but at least it looks like they are having fun. (LINK)
LOVE a block window. (LINK)
If you are having fun and would like to support my work, here are several ways to do that:
Throw a like or comment on this post
(it helps more people find their way here!!)
Share this post with someone who might be into it
(I would be so appreciative!)
Upgrade to a paid subscription
(wow, you rule.)
(we should be friends??)
🤍
love this
Thank you for walking me through this. I’ve wanted to make this since I was a child.🫣 this is the summer!